
A little back story: The desk has been in my family for more than 35 years. It's a little plywood desk, and by the time we moved into our house, it was in desperate need of some love. The desk has a lot of sentimental value for me, I took it with me when I moved out of the parent's house nearly thirteen years ago and I couldn't imagine ever giving it up.
I decided to give it a whole new life. I followed this tutorial on Young House Love, and a week later my desk went from this:


As on YHL, I lightly sanded the desk, applied primer, then put on several light coats of white (I used semi-gloss by Behr) paint until I was satisfied with the color, and then I applied a light coat of Poly. I removed the hardware (prior to painting the desk, of course) and spray-painted it with Rust-Oleum oil-rubbed bronze. It's a whole new desk. And it needed a new chair.
I followed the same steps with the chair: sand, prime, paint, paint, paint, poly. Meanwhile, I removed the seat and prepared to reupholster it. This was the fun part.
This was the seat before:

Eeeew. I removed the fabric, and lo and behold, there was a whole other layer of upholstery underneath! And it was gorgeous!

Although I loved the texture and aesthetic of this fabric, it wasn't what I had in mind for the chair. I decided not to remove it, because it's a good fabric and why not? I wonder how old this chair is, because there was a THIRD layer of upholstery underneath:
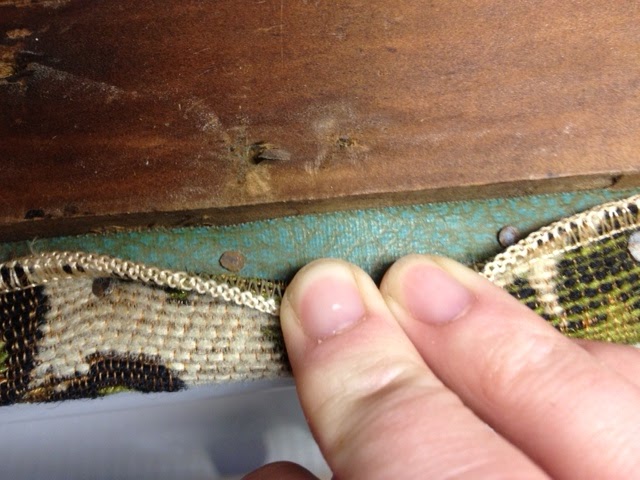
It was like a form of leather. So perhaps this will be the chair's fourth transformation?
I wanted to give the seat a little extra cushion, so I bought some cheap polyester quilt batting from Jo-Ann Fabrics (it was 50% off so I paid $5!), and put two layers of it between the seat and the new fabric.
I used left over upholstery fabric from a previous project, and then went to work with a staple gun.
I secured the finished seat on the newly-refinished chair with new screws, and voila:


Now I have a bright, cheerful, cushy new chair for my sewing desk. With the exception of the quilt batting, I used all materials I already had on hand, so this project only cost me $15. Can I get a high five?!
No comments:
Post a Comment